Getting started
Prerequisites
- Bun 1.4+
- Docker (for Postgres)
- A Chromium for the agents' browser tools:
make setup(orbun run setup:browsers) runsplaywright install chromium; the Docker image already contains it - An Anthropic API key
- Optional: OAuth apps for GitHub, Atlassian (Jira + Confluence), Linear, Slack
Install and run
git clone https://github.com/rayedbajwa/spaces.git
cd spaces
cp .env.example .env
# Edit .env — set ENCRYPTION_KEY (openssl rand -base64 48); add provider keys
#   in the app under Organization → Models afterwards
bun install
bun run db:up            # Postgres in Docker
bun run db:migrate       # idempotent schema (the server also applies it at boot)
bun run web              # web UI + API on http://localhost:3000
bun run supervisor       # in a second terminal: one worker per active project
bun run worker starts a single shared worker instead of the supervisor; it
runs jobs from different projects concurrently while honouring each project's
concurrency limit.
With the Makefile
make setup          # .env (fresh ENCRYPTION_KEY), bun install, Postgres, schema, frontend build
make up             # Postgres + web server + supervisor in the background; logs in .run/
make status         # processes, live workers, queue depth
make logs           # tail server + supervisor logs
make restart        # restart server + supervisor (runs are re-queued or stay paused)
make e2e            # bring the stack up and run the e2e suite for every pipeline template
make e2e-one T=aidlc-feature
make e2e-canary     # the smallest template only
make docs           # strict MkDocs build
make down           # stop everything
make help lists all targets.
Provider keys live in the app
Anthropic, OpenAI and OpenRouter keys are added under Organization →
Models, stored encrypted and verified when saved. A key left in .env
or the shell is ignored; the server logs a warning naming it at boot.
Sign in and create your team
Open http://localhost:3000. With no accounts yet, the sign-in screen offers Create the first account; that account becomes the owner of the first organization and its default team, and adopts any existing projects. Afterwards, registration is by invitation: open People in the sidebar, invite teammates by email and role, and share the generated link. Teammates can also Continue with GitHub. An account that registers without an invite starts its own organization, which shares no keys, integrations, knowledge or projects with yours. See Organizations, teams & access.
Bring your model keys
Required before the first project
New project stays disabled, and POST /api/projects answers 409,
until at least one provider key is stored. The Projects page shows a
banner with a shortcut to Models until then.
Spaces routes across the model providers you already have accounts with; it ships without any. Supported providers and where to create a key:
| Provider | Get a key | Notes |
|---|---|---|
| Anthropic | console.anthropic.com → API keys | Claude models directly (sk-ant-…) |
| OpenAI | platform.openai.com → API keys | GPT models directly; also serves knowledge-base embeddings (sk-…) |
| OpenRouter | openrouter.ai → Keys | One key for every vendor; OpenRouter routes each request itself (sk-or-…) |
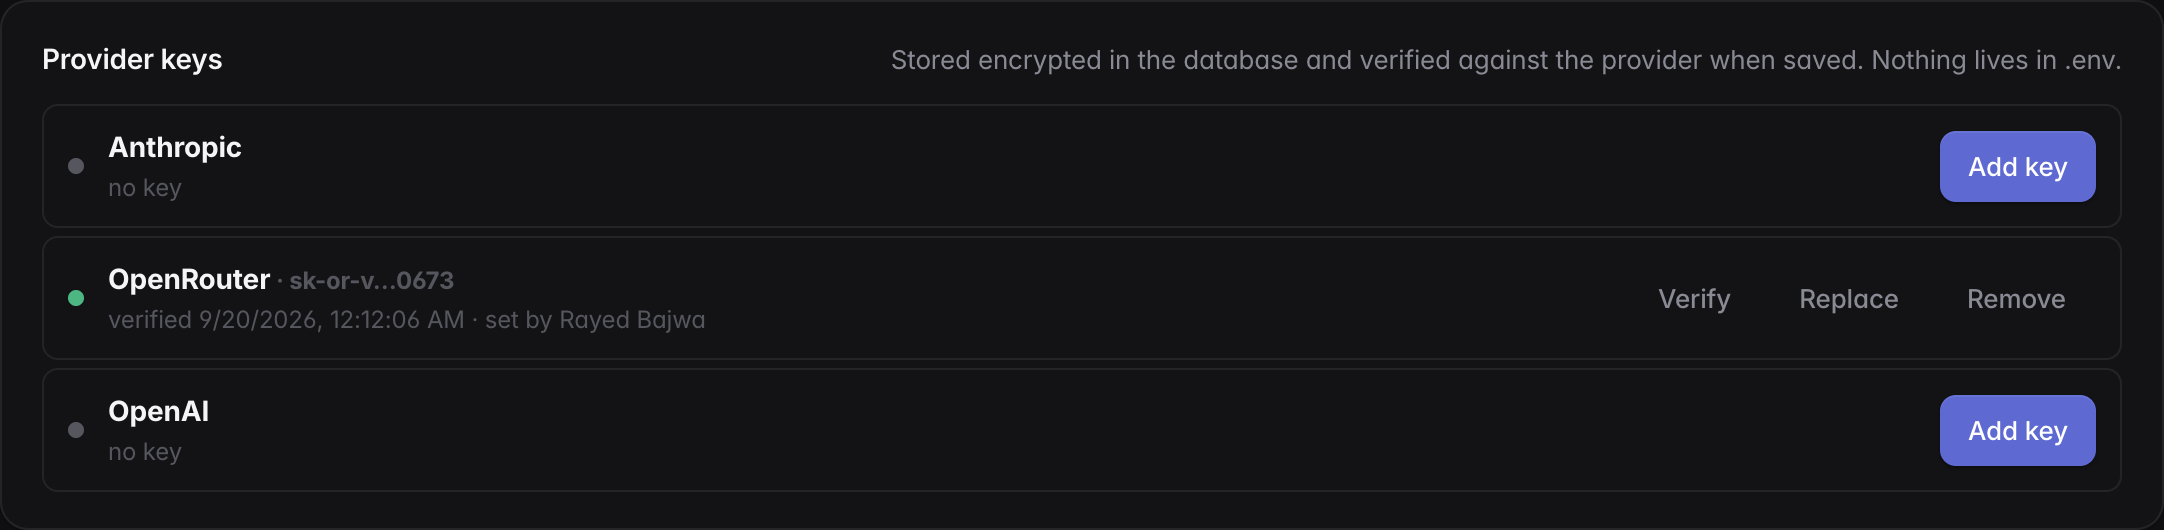
- Open the account menu → Organization, then Models (the account menu's Models row goes straight there).
- Under Provider keys, press Add key for Anthropic, OpenAI or OpenRouter and paste the key. It is verified live and stored encrypted; a rejected key is not saved. One provider is enough.
- Read the Model routing card: it shows which provider routes and what the small / medium / large tiers resolved to, with the reason. Adjust the Policy (cost / balanced / quality, provider order, premium models, pins) if you like. With OpenRouter, OpenRouter picks the model per request.
Keys take effect in every process within a second — no restart. See Configuration → Models for the details.
Connect GitHub
Open Organization → Integrations, press Set up app on GitHub and then Create GitHub App: confirm on GitHub, come back, press Install on GitHub, pick repositories, and the connection is approved on the way back. Once connected, every repository the account can see is indexed with its README use case (the repository catalog), and the new-project wizard can autocomplete repositories.
Create a project
Click New project and walk through the wizard:
- Name and description. You can also Import from Jira / Linear: pick a ticket, and it fills the name, description and first feature and is attached to the project as knowledge.
- Repositories (optional). Specs and memory live in the project's governing workspace; code repositories can be added now (GitHub owner/name or local path) or left to onboarding and the plan.
- Integrations. Optional.
- First feature. Describe it and choose Create + run AIDLC.
Onboarding then runs while you watch: clone remote repos → initialise the Spec Kit workspace → inventory and learn each repo → build project memory → suggest repositories and work areas → set up the development environments. When it is done you review the suggested repositories (Add & clone) and continue; the first run starts in real checkouts. When nothing registered or in the catalog fits, discovery proposes a new repository instead: a GitHub-safe name derived from the project, private by default. Spaces does not create repositories: Create on GitHub opens GitHub's new-repository page prefilled with the proposal. Come back to the tab and Spaces looks the new repository up (or press I created it — select it), offers it with your most recently updated repositories, and Attach adds it, clones it and makes it the primary repo when it is the project's first.
Follow a run
Open the project card. The run panel streams the agent's output live; the tabs show specs, test plan, implementation workstreams, QA, the assistant, shared context, memory and promotions. Paused runs show an answer box (Approve and continue for review gates, Continue or a typed answer for clarifications). Failed or interrupted runs offer Rerun from <stage>.
Next steps
- Understand the pipeline templates and pick one per kind of work (feature, bugfix, refactor, infra, …).
- Scope the project's knowledge sources in the Context tab.
- Read how delivery drives PRs, review, merge and UAT.